The Computer Manager is the central location for managing, organizing, and interacting with your computers in LabStats. All of your active computer records are listed here, along with relevant information on them like groups, tags, and other metadata. The Computer Manager will often be used to track hardware refresh actions, and it can also perform other tasks. This page will contain short guides for each of the different functions available:
- Adding tags
- Moving computers
- Decommissioning computers
- Downloading the Computer Manager table
- Interacting with decommissioned computers
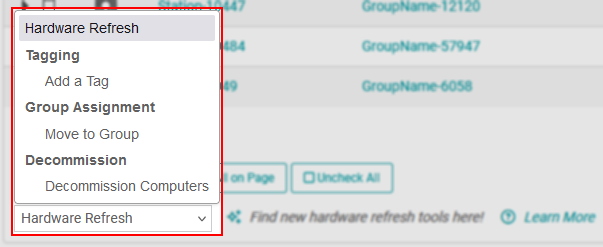
The most important functions will be accomplished using the Hardware Refresh tool under the Computer Manager table.
Adding Tags
Adding tags to your computers is a powerful way to enhance your reporting capabilities. You can create a tag for anything you’d like, attach it to all relevant computers, and then use that tag to filter results to or exclude results from your reports. You may want to create a tag for computers that have printer access, that accommodate wheelchairs, or that were purchased in a specific timeframe. You might also use tags for financial information, like which computers were purchased with specific grant funds, or with which department’s budget. Any information relevant to your computers could be a potential tag.
To add tags using the Computer Manager, utilize the search filter and search criteria dropdown menu to get the list of computers you’d like to work with. You can use the “Show All Computers” dropdown menu on the right side of the table to quickly filter down to a specific group if you’d rather approach it that way. Once you have the list of computers you want to add tags to, simply click the checkbox next to each record you want, or use the “Check All” buttons located at the bottom left of the table.
With your desired computers selected, click the “Hardware Refresh” dropdown menu and select “Add a Tag.” Type your desired tag in the newly appeared text box, being aware of spelling and formatting to avoid multiple confusing tags, and click “Add.”

Moving Computers
Computers need to move around sometimes. On a small scale, a motherboard may have died and another computer needs to be shifted from somewhere else to fill its place. Larger scale moves may involve entire labs being phased out and replaced with not-quite-so-old computers. These kinds of changes need to be recorded in LabStats to ensure accuracy of reports, and the Hardware Refresh tool has the Move function to do just that.
To move computers using the Computer Manager, utilize the search filter and search criteria dropdown menu to get the list of computers you’d like to work with. You can use the “Show All Computers” dropdown menu on the right side of the table to quickly filter down to a specific group if you’d rather approach it that way. Once you have the list of computers you want to move, simply click the checkbox next to each record you want, or use the “Check All” buttons located at the bottom left of the table.
*Please note that all computers moved with the same action will need to have the same move date. Any computers with different move dates will need to be moved separately from each other. To represent multiple moves of the same computer or computers, start with the oldest move first, then each subsequent move in chronological order.
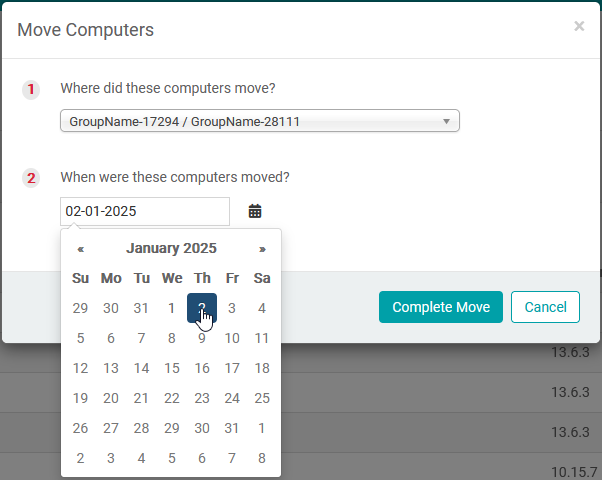
With your desired computers selected, click the “Hardware Refresh” dropdown menu and select “Move to Group.” Use the “Move Computers” dialog box to select the group you’re moving these computers to along with the date that they moved. Click “Complete Move.” This will move computers to their new locations and record the move in the database so that reports appropriately display their usage based on where they were during the report’s selected time period.
Decommissioning Computers
Computers don’t stick around forever. When they break down, slow down, or age out, LabStats will need to know that this computer isn’t expected to check-in again. You can do this by using the Decommission function in the Computer Manager. This helps keep things accurate from a licensing perspective, cleans up your groups, properly archives data for reports, and keeps the Computer Manager representative of your active machines.
*Please note that decommissioning a computer isn’t permanent. If a previously decommissioned computer is connected to the internet with the LabStats client installed, it will show up as an unassigned computer in your Computer Manager. The best practice is to decommission a computer whenever you uninstall LabStats, even if you think you might deploy that computer again in the future.
To decommission computers using the Computer Manager, utilize the search filter and search criteria dropdown menu to get the list of computers you’d like to work with. You can use the “Show All Computers” dropdown menu on the right side of the table to quickly filter down to a specific group if you’d rather approach it that way. Once you have the list of computers you want to move, simply click the checkbox next to each record you want, or use the “Check All” buttons located at the bottom left of the table.
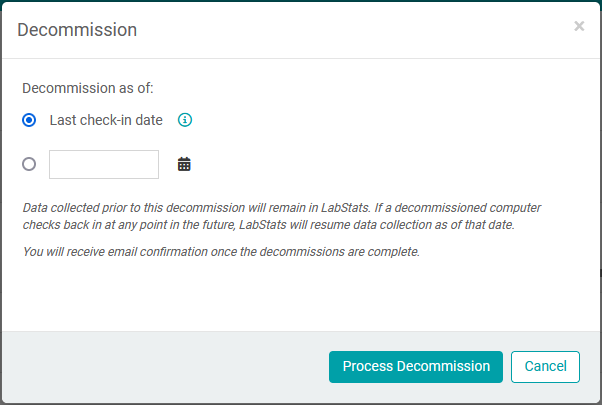
With your desired computers selected, click the “Hardware Refresh” dropdown menu and select “Decommission Computers.” Use the “Decommission” dialog box to specify the date that the computers were no longer in service (most often this will just be the last check-in date) and click “Process Decommission.” The last check-in date will be the last time the computer is powered on and connected to the internet with the LabStats client installed. Your computers will now have their data archived and they will be removed from most views of the Computer Manager.
Downloading the Computer Manager
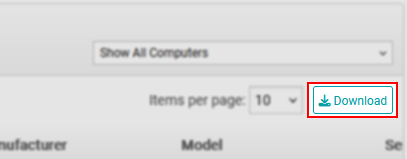
If you want to get a full list of all of your active computers within LabStats, you can very easily download the Computer Manager into xlsx format. All you need to do is click the “Download” button on the right-hand side of the Computer Manager table.
Interacting with Decommissioned Computers
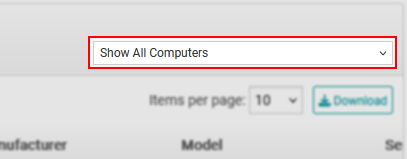
There are rare occasions when you’ll need to access decommissioned computers. You may want to add tags, adjust historical data through moves, or review their metadata. In these cases, you can access the list of decommissioned computers using the Computer Manager. Simply click the “Show All Computers” dropdown in the upper right-hand corner of the Computer Manager table, scroll all the way to the bottom, and click “Filter By Decommissioned.”
This will now display a list of all decommissioned computers, and you can use the search filter and search criteria dropdown menu as normal to get the list of computers you need and use the tools listed earlier in this article.
If you have any questions, please reach out to us at support@labstats.com, or by calling (208) 473-2222 opt. 2.